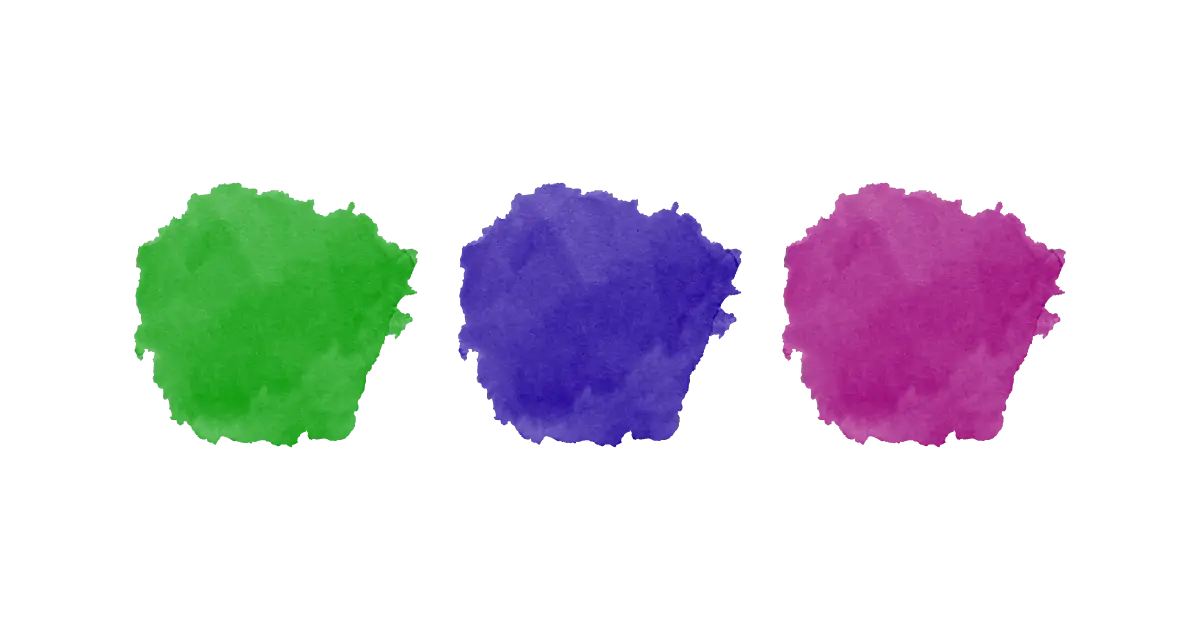
How to draw watercolor vectors? Detailed guide with examples
Creating watercolor vectors is always a tricky process, and you cant expect the same results as you expect when drawing on normal paper. But alongside, illustrator gives us the advantage to have more control over the color’s flow, layering, elements designing, etc. Though there exist multiple software to draw water paint art, in this guide we will be talking about how to draw watercolor vectors based on hand-drawn work.
Steps to create a Watercolor vector:
Step:1
Take two or three different colors and thoroughly mix them in water. Don’t let any particle un-dissolved. If not mixed well, these tiny particles will leave bad, unpleasant marks on the paper at the time of painting. Always make sure, the water paint is clear. If not sure, better to filer your watercolor with a clean porous cloth.
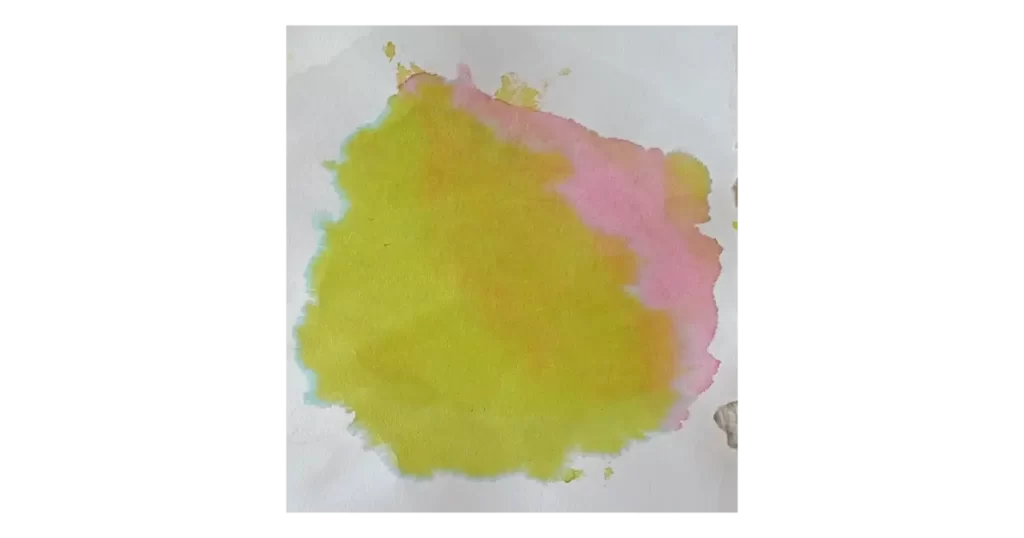
Step:2
Take a thick and clean paper and make it slightly wet but not high. Now, apply watercolor on the paper with the help of a clean brush. Slowly spread the color. Apply the second color once the first color starts settling. You can apply the third color too.
Sprinkle some drops of water over the paper. Take a small piece of clean plastic sheet and use it to cover the paper. Remember not to press it tightly, otherwise, it will break the paper.
Step:3
Remove the plastic sheet. Here comes a beautiful mix of watercolor patterns. Carefully handle the paper, and place it in sunlight. Don’t expose the paper to harsh sunlight as it will destroy the color dye, eventually making the painting fade and dim.
Step:4
Scan the painted paper or take its picture with the help of a high-quality camera. You can use a mobile phone too if it has the best photo results. Now transfers the photo to your computer. Always use Gmail/google drive while moving to the computer as it keeps the photo in the same resolution without losing the quality.
Alternatively, the photo can be transferred by using a cable connector.
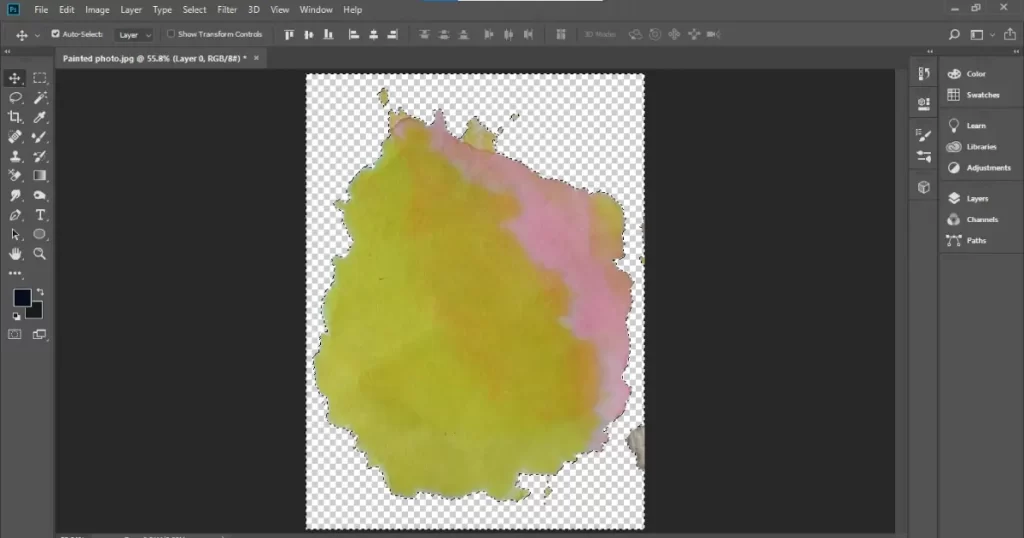
Step:5
Open the painting photo with photoshop or other photo editing software. Isolate the white part/background from the painted part. Adjust the brightness, exposure, curves, etc to get the best results. Save the final art in a transparent format such as PNG.
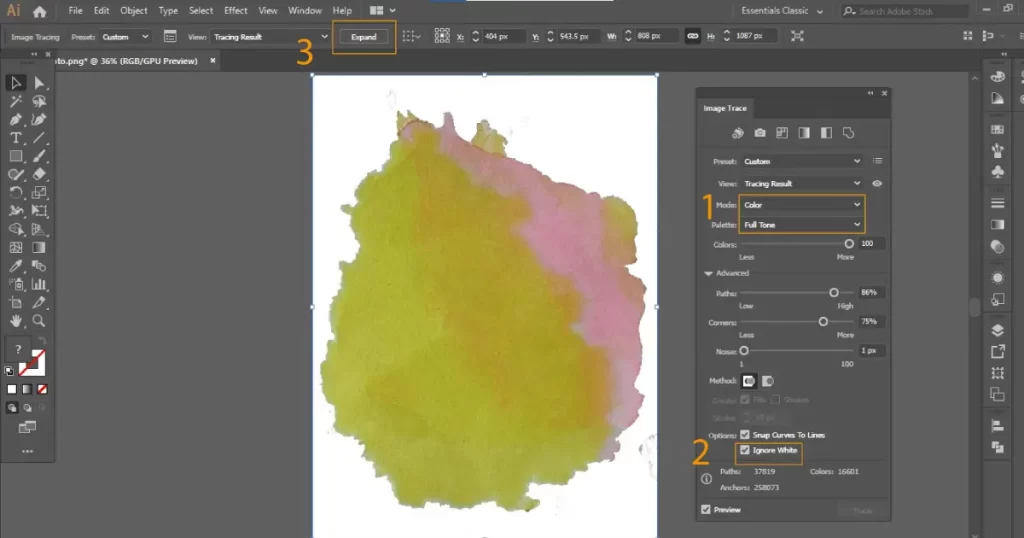
Step:6
Launch Adobe Illustrator to open a transparent painting photo. Select the photo, go to window, and choose “Image Trace”.
Image Trace Setting:
- For the mode, please choose “Color”
- For the palette, please choose “Full Tone”
- Select the path, corners, and noise according to the image’s result.
- Checkmark the “Ignore White” button.
- Click on “Trace”
Click the “Expand” button to expand the traced image.
Now ungroup the image, and remove white parts, so that only colored (watercolor) elements are left behind.
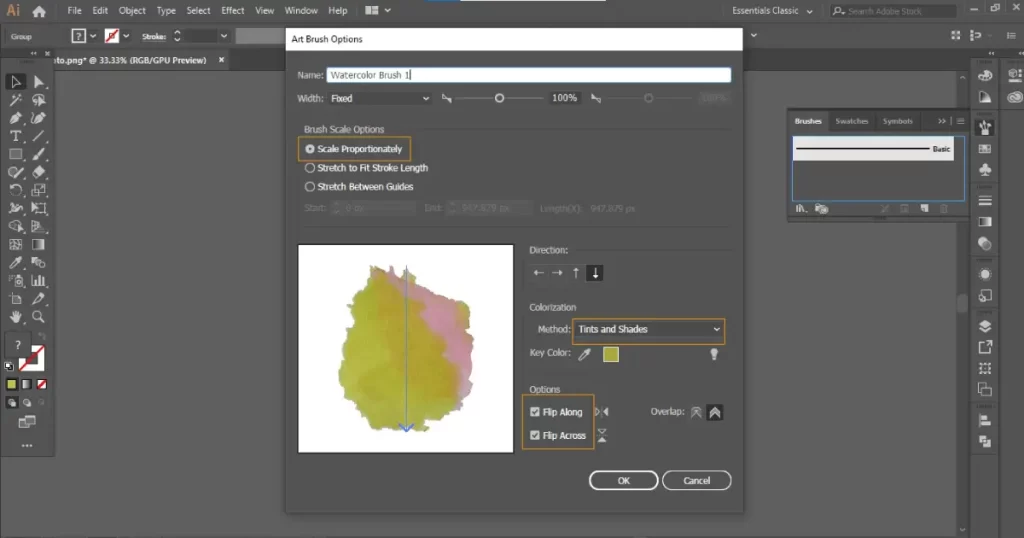
Step:7
Making an Art Brush
Again group the painted photo once the white parts are gone. Now pick the image and drop it into the brush tab to make a new art brush.
Art Brush Settings:
Select “Scale Proportionately”.
In colorization, choose “Tints and Shades”.
Please checkmark the “Flip Along” and “Flip Across”. Then hit ok.
Final Step: Drawing Custom Art:
Choose the newly designed art brush, and design whatever you want. The illustrator brush gives the freedom to apply them over a variety of shapes. Plus, we have the flexibility to pick the colors of our choice for different layers. Rest depends on your creativity, you can draw what you want.